-
MK1 R32 4-Motion Sport
Hi Guys The Caddy build has recently taken a more definite change in Direction so using this opportunity to
move the thread into the mk1 Section and have a thread for it that is freshly inline with the build.
Anyone familiar with the build the fresh pics are straight on page 2
Cheers Benny
Updated Intro,
ok so whats been going on!
I literally spent 2 hours standing in front of this thing
just before going crazy with the grinder and thought WHERE is this Going!
I needed some help to get clarity and even a push over the edge.
So i rang a Alex G and said you know i keep looking at this engine bay and thinking
i want to bust the grinder out and cut it all of !?
and he knew exactly what i meant.
So it was done...
I guess up until now i have been trying to mash a few different worlds together and
it was starting to look like a Mish Mash.
Now it's decided - Purely Motorsport inspired machine -
No Smooth bay
No Classic looking steering wheel and seats
No whatever else i still had rattling around in my head form the
start of this build.
Will be driving it to hill climbs and track days for fun.
Finally feeling better about where its headed.


Last edited by Dub Toffee; 17-08-2013 at 12:32 PM.
-
drivetrain and gearbox from a bora 4 motion v6.
[IMG] [/IMG]

[IMG]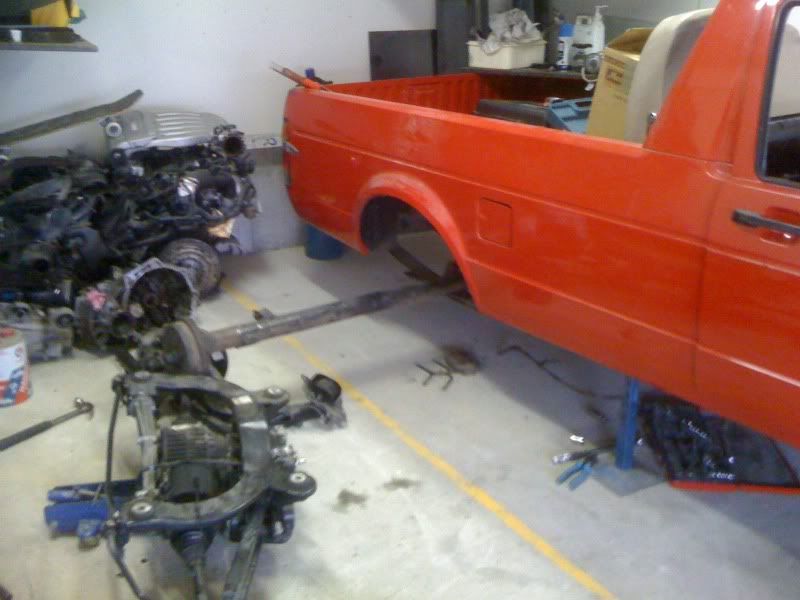 [/IMG]
Been looking at options for configuring under tray braceing and strengthening.
Im looking at haveing tubing arrangements that extend from the back of the tray right thru to the engine bay but remain mildly inconspicuous. From the Cabin Forward I will be Submitting to Bond Roll bars as they are the experts in both metal and design, Might end up looking something like this...


Got a new jack hopefully will get a few decades out of it 
Nice and light Aluminium its so awesome 
[IMG]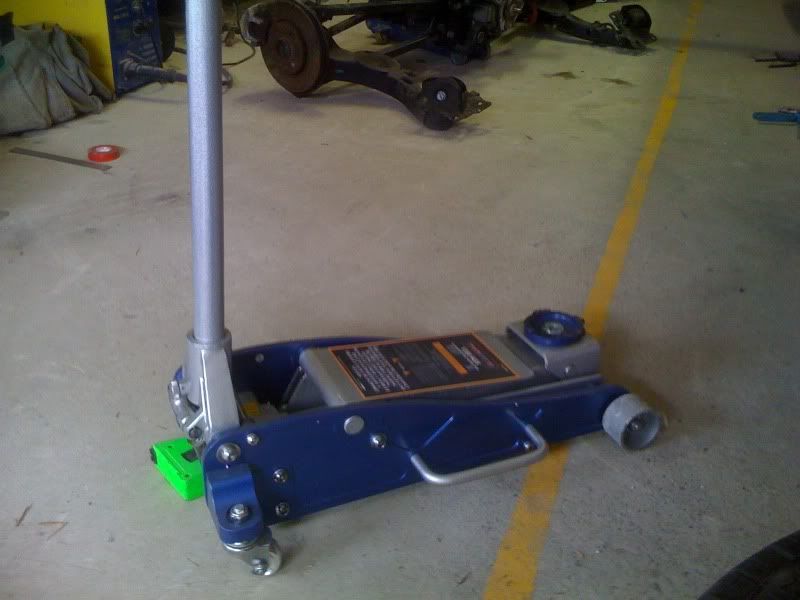 [/IMG]
nice shot of rear subframe. il put up some measurements ect soon
[IMG]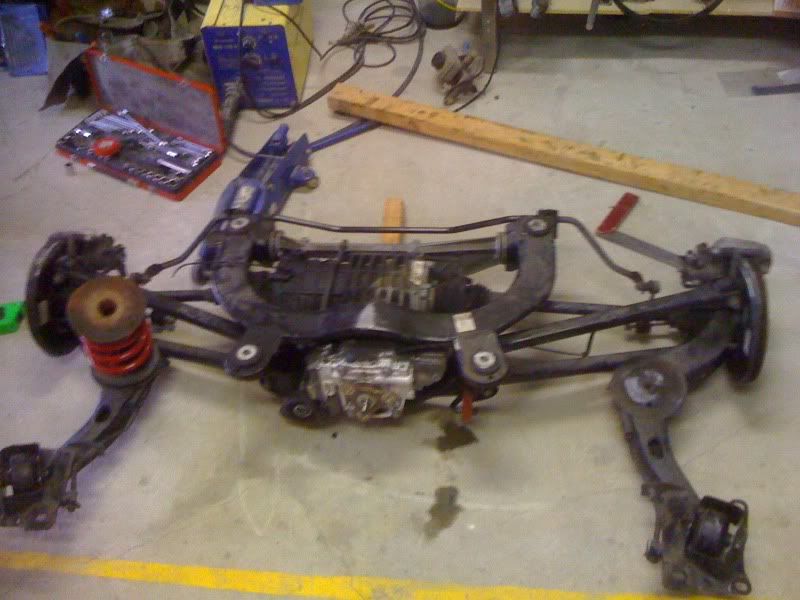 [/IMG]
hopefully have subframe up by mon noon and Arms shortened for a temporary fit ect...
Soo wont be getting engine till after x mas now  might be focusing on smoothing the engine bay or something next...
The Petrol tank is going under the Front of the Bed and I cant wait To do a Custom Cell that sits over the drive shaft...I lurve stainless.
IM now up to shortening the lengths of the control arms
instead of cutting a section out of the middle it looks best to take some meat from one end.
Width of this is 36mm

Zero the calipers and add 40 mm to scratch a mark and this is where the edge of the mount will meet. THis is Pending decision on wheels so wont be cutting just yet

I have the option of shortening the drive shafts ect... an extra 20 mm and using 20mm spacers to put the 15 inch BBS wheels back on.
with a spacer the wheel will comfortably take the existing brake disc and caliper. It all fits in the wheel with lots of clearance its just the caliper that is sitting forward to far for the wheel to sit flush with the front of the disc. expecting all these ideas to go out the window at this stage lol
Last edited by Dub Toffee; 17-08-2013 at 12:33 PM.
-
Been offline a bit because its hard to get bits done on the car and then have wifey not get annoyed that more time gets spent on a car forum haha just tryin to keep the balance.
before taking out the frame i made under the tray i found time to make mounting points for the trailing arms and make some holes in the chassis to accommodate their rather large space.

This shows the angle i got for the inside plate so its lines up vertical with the rest of the chassis. should make it easier to get some serious fixing points happening to the frame ect


I spent a few days chasing some decent rose joints and Forged Aluminum with an appropriate tensile rating as i am now going the whole hog and making my own adjustable control arms. p.s. Calm Aluminum are fantastic they also have engineers you can talk to about what you are doing and that have the knowledge to recommend the right grade of tensile metal for you. 1.6m of Alu rod cost about 50 dollars. I got on the Lathe at work and turned them up. As it was my last day working at the factory last fri i could only use their workshop one last time... so I pulled an all-nighter alternating between the surface grinder and the lathe till 5 am when i crawled back home haha

the control arms should be finished this week just have to source some 16 mm bolts that are 100 mm long and cut down the stainless u shapes to size.
I have Also spoken to some engineers and a couple of very helpful people in the motor sport scene in NSW.
First off i had fun buying thirty dollars of mild steel tubing and building the first Base frame. working out all the angles, gettin the tig up to 150 amps grinding away happily. All the while knowing that yes it is not seamless tubing, many have simply fixed that with a can of black spray paint non the less and ...Am i happy about that? WEll to answer the question (no). Plus I want my engineer to have a nicely done spread sheet showing all the metals with certificates mods ect ect and references to the appropriate rules. Their we go sir im not a hillbilly so what do you want to look at first .
SOOOOOO of i went to Andrews Race cars, Mr Metal and bought the right stuff.
6m cost 150 dollars
and i started work on the new frame. i like doing things a second time because it always comes of better
made a nice flat bench to make a nice flat frame... was so worth it!


IM not the best at Tig welding but seriously their is a massive difference in welding this and the cheap mild steel from china. Not to mention the Higher Tensile rating love this metal

IM liking the look of these wheels they fit inside the arches and can take the R32 size hubs front and rear

hey hows this mk1 vrs mk4...

phew was a mission wrestling with different measurements 2 car jacks and a laser level to try and get the new frame spot on but finaly got it in today. I was a bit peeved it took so long groveling around on the concrete and grinding dust but oh well whats a bit of stress.

Today worked on finishing off the control arms.
Also finished up the welds for fixing the frame to the chasis, next thing get trailing arms welded in place and suspension.
-
Well this is my last week off work of the 2 i had my little brothers been up from Tas so ive been takeing him surfing in the morning then we grab coffee like you do when your 15 ?? haha and on with the day. Hes usualy going back for more waves and skateing and im going back to the Caddy for more punishment.
No more jacks holding up the trailing arms i finally got the trailing arm mounts into position and welded to place with 2 of the 3 braces.
Gota love the fumes from putting a heat gun on to all that muck under the tray ...
There is one pipe to frame brace you can see and some 8mm taggs bottom right of mount, the third mount should go in tomorrow a second pipe to frame brace. 
Also started on mounting plates for the springs.


All i needed to do for the sway bar was just flip the link to the opposite side of the sway bars Mounting hole.
Fits sweet. Next step make up brackets for struts, then nearly done for the rear...

pretty happy to have the welding done under the tray now and shes lookin pretty.
I added an extra support for the trailing arm mounts. I was going to feel guilty if i left it out haha and since i took the whole kit out for painting i had the space to maneuver around under the caddy to get them welds in.
now their is absolutely definitely NO flex whatsoever you can put a jack under this point now if you want to.


next step give rear diff and its frame ect a nice good clean get any unwanted grim away and install all shiny
made my last stop in at the garage for the holidays now im giong to kick back and go Spearfishing of north Bondi
got the hiigh pressusre hose out and gave the subframe and diff a good blast as the top was not very clean. will hopefully be sorting out the wishbones and mounting the engine next ect. over the next month


-
The r32 came up for wreaking a month or so ago
the engine only has 100 kms on it
I got engine, Ecu wiring instrument cluster and transponder from the key
When it arrived i Took a few fun pics of it


the caddy is back on the operating table now
Getting some facial reconstruction.
Nothing out of square just that the left side repair
Was the typical pull into alignment and knock the wheel arch into shape joby, but I didn't like the look
of the wrinkly metal I wanted a smooth
Original wheel arch and chasis rail.


lookin at the engine mounts i have been working on
not sure if i will be happy with them in the end but its something to work with for now...

thats sliced all the way thru still to be fully welded and reinforced


Just a flick of silver paint so you get the idea but will get the smooth touch in due course

getin some help from the laser agian

-
And here is her final resting place, Nice and SOOOOO tight

I Now have the Brake booster set up and pedal from a Bora V5 as well as the clutch pedal assembly
Il have to FAB a new plate for the hole in the fire wall but its going to work much more nicely overall!
Also Took to The Tunnel...
got the drive shaft in a mockup position.
Its to short and will be getting extended soon enough.
The Idea is to - Get the brake booster and Clutch set up in
- Get steering rack in place and set up
- sort out the strut towers and suspension including tube work
- make any necessary mods to get the steering/strut/hub set up right, things like
bump steer
- get Tail shaft lengthened and balanced
- driveshafts front and rear
- Having said this it could change tomorrow but one has to have some idea at least.


Watch This Space
Update.
Kind of Freaky but i did put a fair amount of time into getting the engine sitting parallel with the chassis
using Bently measurements but,,, Since getting extensive Caroliner measurements and measuring the output on the gearbox for the
front to rear driveshaft its damn near perfectly parallel and centred!
this is good news for me because i only have to focus now on the rear which was off by about 6 deg.
Unfortunalty i didn't have enough play in the frame to turn it true even with my modified bolts that are based of original Vag 10mm bolts.
Anyway its a challenge. So their is a plan in the works and its well underway.
New jack stand that i have made for the rear of the Caddy.
this is helping me to set the chassis of the caddy level
and about 700mm of the ground whilst i work under their and get all my measuring and setting done.

Modified Bolt x4 used for mounting haldex frame
Thanks to Bret an industrial electrician at work i know who is also handy on the Lathe

Previous spacers drilled out and now being replaced so as to get perfect as practicable alignment.

new Spacers 50/50/20mm now mounted underside of space frame tags.
As the haldex unit already was sitting quite high of the ground i could afford to lower it
and make my job of repositioning the frame easier.

ok This is cool.
Big thanks to Al who swung this piece of seamless tube on his trusty Lathe.
Glad to have your mark on the Caddy mate.
This Tube will be handy to help mock up the tails haft and get the positioning right for the centre bearing. after which i will have a new tail shaft made.


The beginnings of a chassis JIG.
Using the caroliner measuring points on the chassis of the caddy
I Figure a JIG can be made to align perfectly with the chassis on varying planes
verticle and horizontal.
From these alignments I want to make a permanent centreline and measure out from this to set the wheel base more accurately
as well as align the engine gearbox output and rear haldex unit.


This Pic is from when i did a basic measurement
from caroliner points and found centre to get a rough idea of where things were sitting.
I knew i had to move the engine roughly 6mm across but it later turned out to be 8mm

Frame coming together


bit of use of diagonals used here to get square and also to have more centre reference points

now things are starting to line up


Sorted

-
gaining extra 8mm on engine mount to shift things across at this end


Sorry I Missed taking photos of how i got the intersecting angles right to position the CV joint
on the driveshaft in the correct position. Obviously this was an important step and involved
squaring some lines from each of the output shafts and basically adjusting the engine on its mounts
and the haldex unit on its mounts until the 2 lines intersected at just the right position for
the centre line of the CV Joint in the driveshaft.
Time to test fit


With the length and angles right a quick few tacks with the welder

Next a Jig to keep the drive shaft in the perfect position whilst i tackle the floor tunnel and exhaust.

IM going to make provision by way of suitable brackets to weld these bolts onto the tunnel.
They are going to allow me plenty of adjustment to get CV joint correctly placed.

Bit of fumbling around with Catalytic converter. At this stage its looking like the exhaust will
have best clearance if i bring it in on top of the driveshaft. Although not ideal to have it on top
Im getting severely limited with options now as The Drive Shaft and Steering Rack take priority for space.

Time to build the tunnel and set new brackets for steering rack.
Bada Bing

Bada Bang

Bada Boom

Messin with some cardboard mockups

As She sits

-
got a few more days in to start work on the Tunnel.


-
Thanks heaps for the support Guys and everyone subscribed hope i can keep you entertained whilst this build goes on
i know the standard of Pics taking has definitely gone up in recent years. Their are some pretty talented awesome builds
going on around the forums and i really don't know how they manage to both (( build and wield! )) 
wield a camera that is! Hopefully i can lift my game in this area as things progress.
Nonethelss!!
Back in Business... we got a long weekend holiday down under and got the order of Stainless exhaust in. Lots more tig welding
ahead. Well as the Mk1 Caddy from USA has the exhaust exiting on the drivers side just aft of the rear
wheel as standard, It just so suited my exhaust design to follow suit in a small way with what
was the original design for the exhaust exit. The exhaust is exiting on the Aussie drivers side tho so the drivers window
can be wound down for a sound check every now and then.


-
 Posting Permissions
- You may not post new threads
- You may not post replies
- You may not post attachments
- You may not edit your posts
-
Forum Rules
|
|


 Reply With Quote


Bookmarks